Assigning IPv6 directly from the primary router to Docker Containers using Macvlan

A guy with a keen interest in computer networks, software development, web technologies, embedded systems, and programming. When I am bored you can find me bingeing anime series, reading novels, and tinkering with hardware and software.
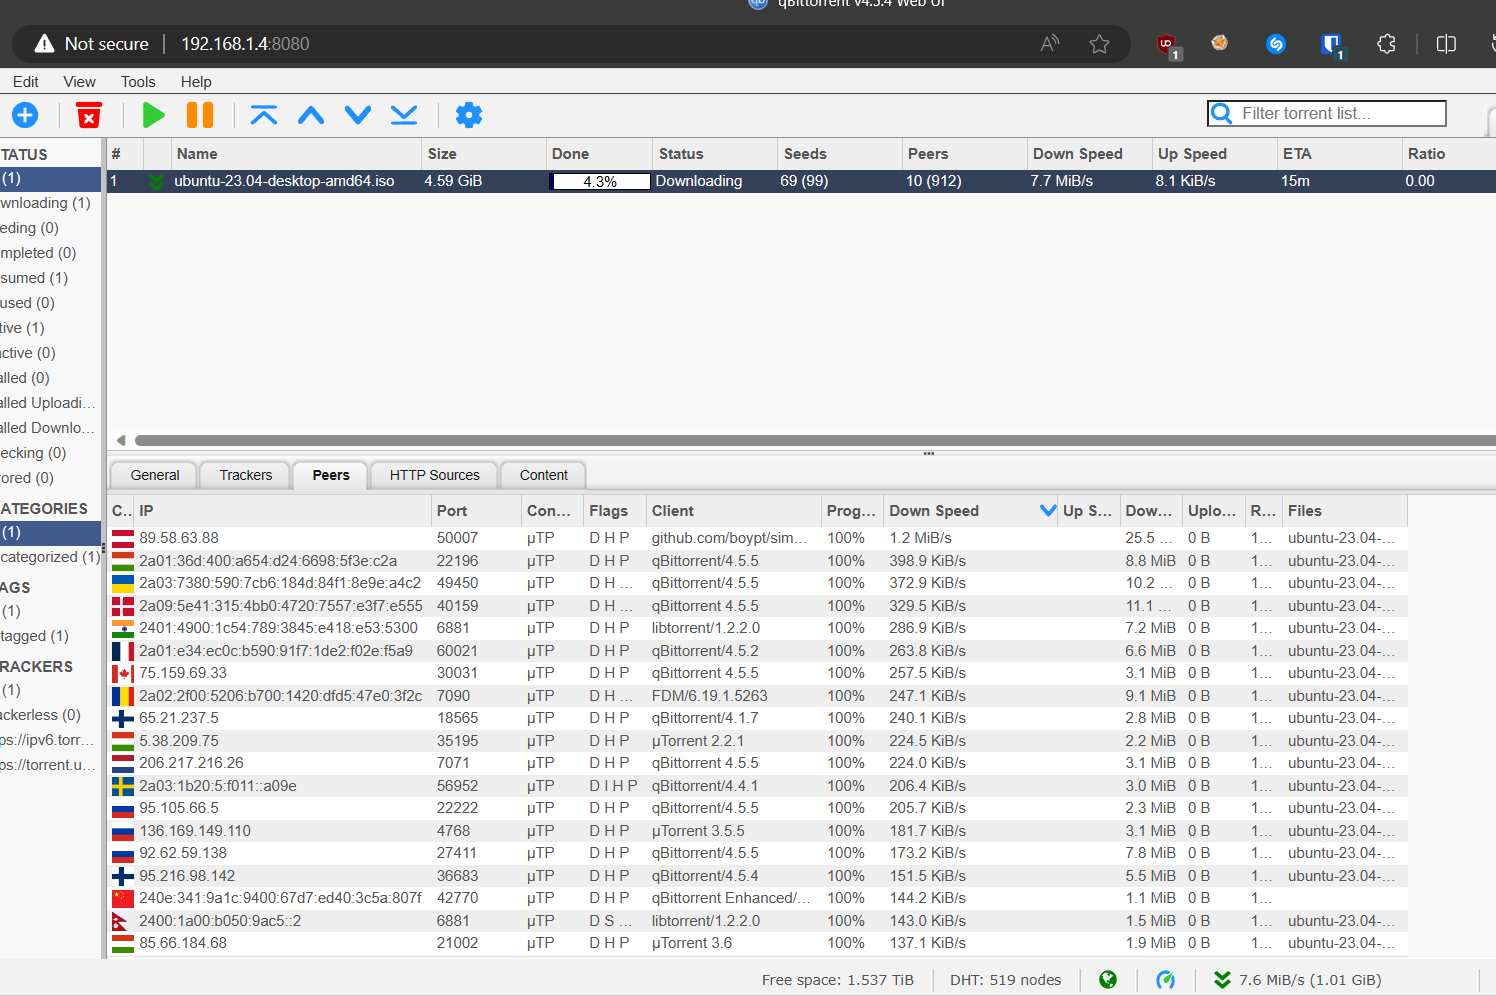
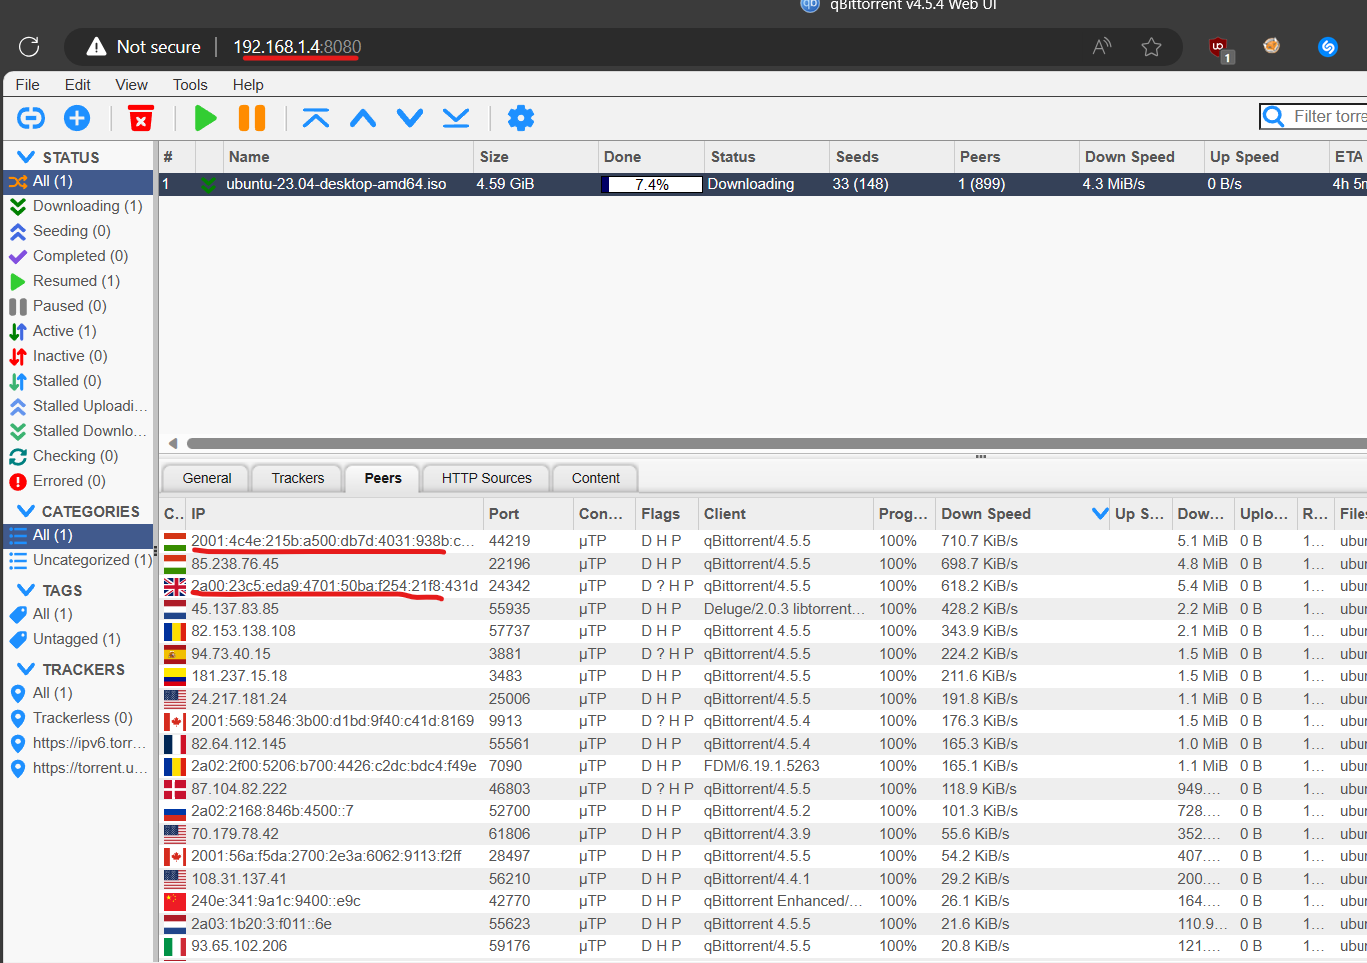
Each container having its own public IPv6 will have tons of benefits. For example, if you are running a torrent client application on a docker container and using it for downloading torrents, with ipv6 assigned to it, it will able to communicate with peers having ipv6 directly and will be able to directly download from them. This will dramatically increase the torrent download speed and even make it possible for you to seed to others or use it as a seedbox. I know it's a strange use case that brought me to use this for my Docker containers, but I am sure it will have its own benefits for other users, especially the ones who are self-hosting stuff and are behind the NAT of their ISPs.
However, I have discovered other use cases for this. Like I can directly expose a service with the same ports from the same machine. With the help of Macvlan, every container will have its own virtual LAN port, meaning it will have its own MAC Address and will act as a LAN port directly connected to my primary router.
To do this first you have to know your IPV6 Prefix and IPV4 subnet of the network.
In my case, let's assume that I have ipv6 prefix 2400:1a00:XXXX:XXXXX::/64
First, go to your server's terminal and create a network with the Macvlan driver in your Docker. To do this enter the command below
docker network create -d macvlan --subnet 192.168.1.0/24 \
 --gateway 192.168.1.1 \
--subnet 2400:XXXX:XXXX:XXXXX::/64 \
 --gateway 2400:XXXX:XXXX:XXXX::1 \
 --ipv6 -o parent=eth0 dualmac -o macvlan_mode=bridge
Make the changes on the subnet and gateway of both IPv4 and IPv6 according to your own Network setup. You can also set it for IPv6 only if you like.
On the parent= , you have to enter the name of the main network interface. And right after that line, you can see that I have written dualmac. You can write whatever you like, it's the network's name so name it as per your preference.
Once that's done, you have created a network with Macvlan, now you can assign it your container.
First, check the network if it has been correctly configured or not. You can do that by entering docker network inspect <Your Network Name>. In my case it's dualmac.
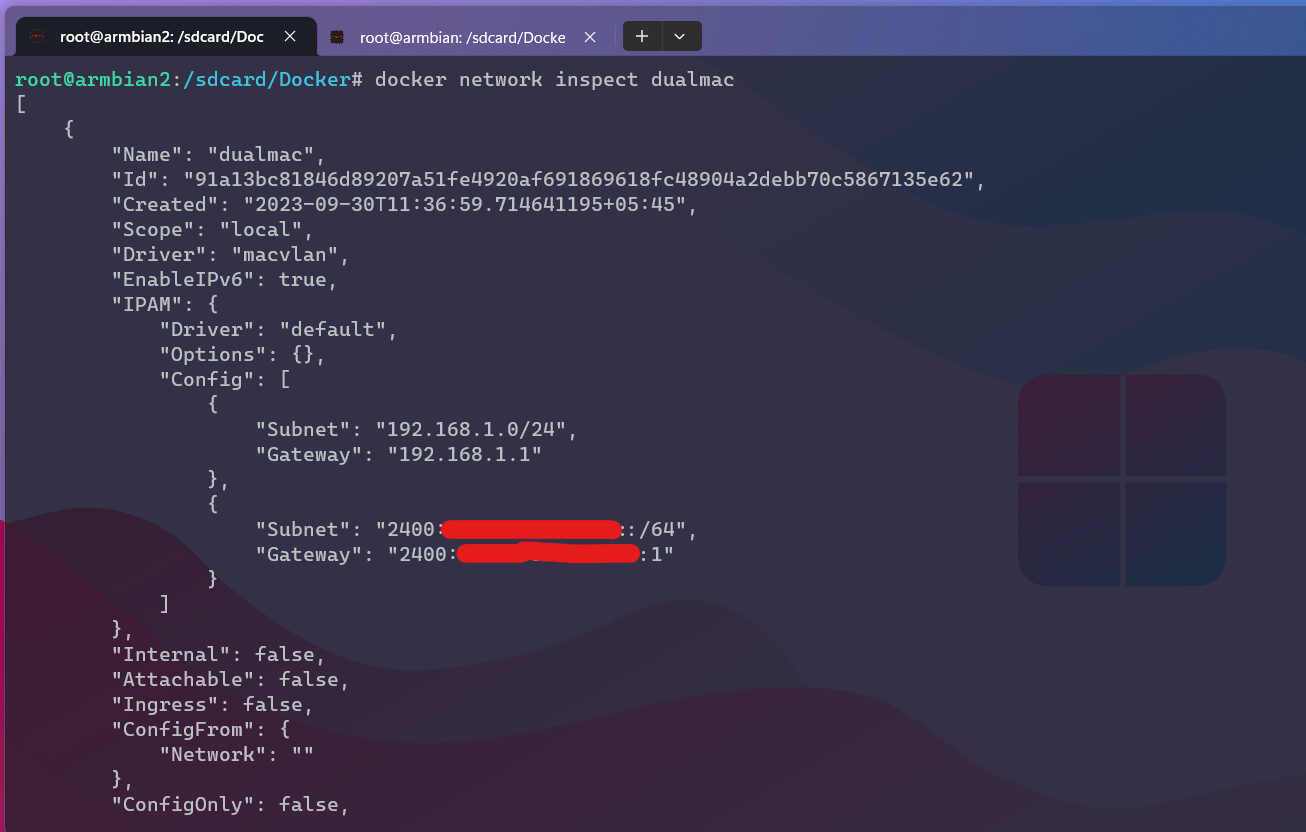
Observe the Subnet and Gateway and make sure they are correct.
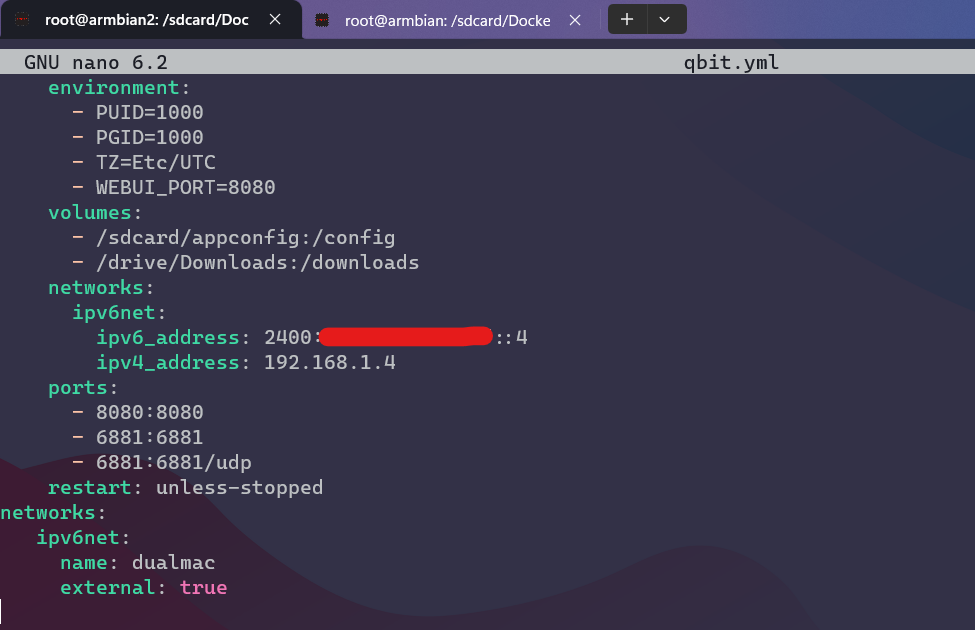
Now assign your container to the network using Docker Compose. In your docker-compose config file add these to assign it to the network you have created.
You can let the docker container dynamically get the IPs, but it often ends up with getting IPs that have been used already, so it's better that you assign them manually from your docker-compose config file.
        networks:
            ipv6net:
            ipv6_address: 2400:XXXXX:XXXXX:XXXXX::4
            ipv4_address: 192.168.1.4

networks:
  ipv6net:
     name: dualmac
     external: true
Place them as shown in the screenshot below. You can name the networks on the config as you like, in my case, I have named it ipv6net . And in the name: dualmac , enter the name of the docker network you created previously. And that's all. Now start your container using the config file, and you should see the container getting IPs directly from your primary router.
In the screenshot below, you can see the torrent client directly communicating with the IPv6 peers.
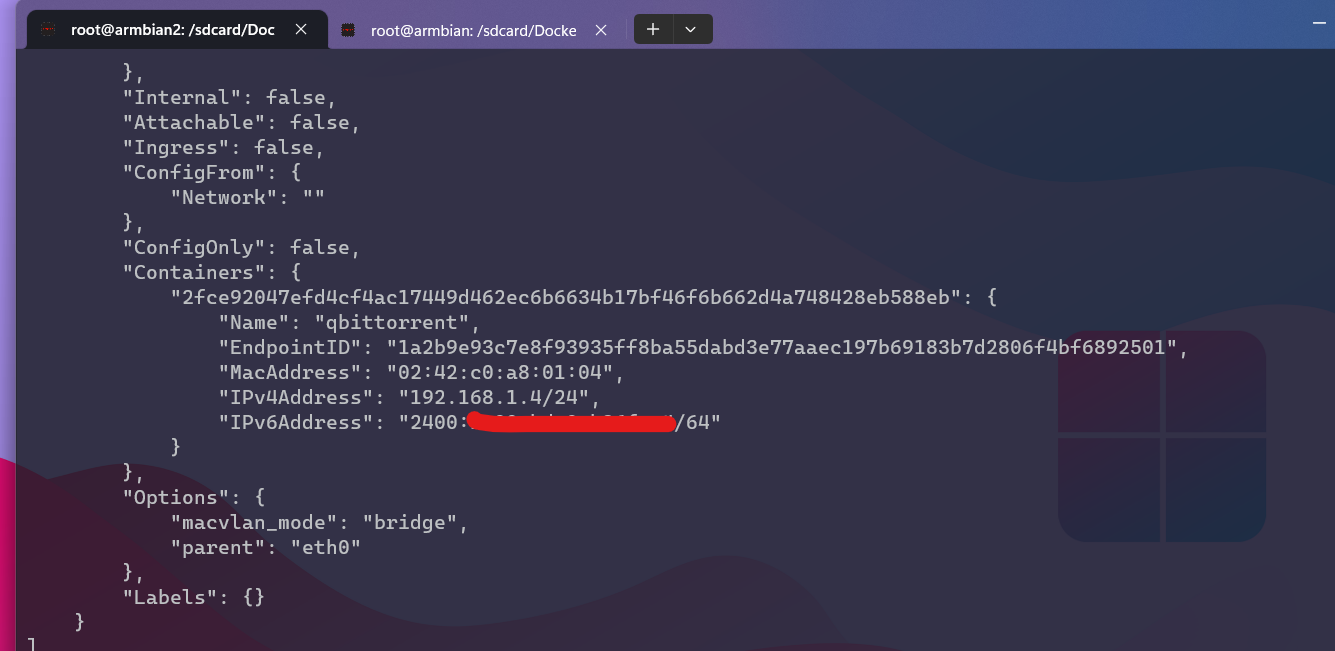
If you do docker network inspect on your newly created network, while running the containers using it, you can also see the IPs and MAC being used for the container.
Note:
If you only want your docker container to get the public IPv6 and nothing else, then you can simply set the network mode to host. With that, you won’t have to depend on macvlan or the hefty, troublesome docker network configurations. The container will act as a network host device and will request your network's DHCP server for IP assignment. And of course, your container will get IPv6. But make sure you have IPv6 enabled in the main docker configuration.