Exposing Self-Hosted Behind the NAT Services to the Internet using Cloudflare Tunnel

A guy with a keen interest in computer networks, software development, web technologies, embedded systems, and programming. When I am bored you can find me bingeing anime series, reading novels, and tinkering with hardware and software.
One of the greatest problems a person faces while self-hosting is the NAT. For people whose ISP doesn't provide port forwarding or a public IP, tunneling or using a VPN is the only way to expose self-hosted services to the internet. Having IPv6 is great for this kind of thing but only the people with IPv6 can communicate with a service that only has public IPv6. You could also proxy the services of IPV6 on Cloudflare by directly adding an AAA record on the DNS, but Cloudflare only allows web services that are hosted on port 80. Meaning, that if you are trying to bring something that's on a different port, it won't be accessible to the users.
Finding the right service provider to fix this issue is really troublesome. Before I was introduced to the Cloudflare Tunnel, I was using Ngrok to expose some of my Nginx web services to the internet. However, it had a lot of limitations, especially for free users. Like, using your own domain name required a premium plan, also the speed and the latency were really troublesome. The randomly generated domain it provides also is not good as they are known for being used in Phishing Attacks.
And then I came across Cloudflare Tunnel. I already had gotten my free domain name from register.com.np and had already set it up to work with Cloudflare. This will help a lot if you are planning on using the Cloudflare tunnel.
Now setting up Cloudflare tunnel is fairly simple. You open up a terminal of your server and enter
apt install cloudflared
Once it's installed, you simply log into your Cloudflare account using the command
cloudflared login
You should be redirected to the web browser. Once you log in, select the domain name that you want to use. Head back again to the terminal and enter the command
cloudflared tunnel create <NAME>
in the <NAME> place, enter the name that you want

You can try entering cloudflared tunnel list command to check if it's been created or not. Also, make sure you note down the location of the credentials file that's on JSON and the ID, which is basically the JSON file name.
Now you have created the tunnel, create a config file so that it will be easier to add services that you want to expose to the internet via Cloudflare Tunnel.
One of the great features of Cloudflare Tunnel is that it lets you use your own domain name while exposing services to the internet.
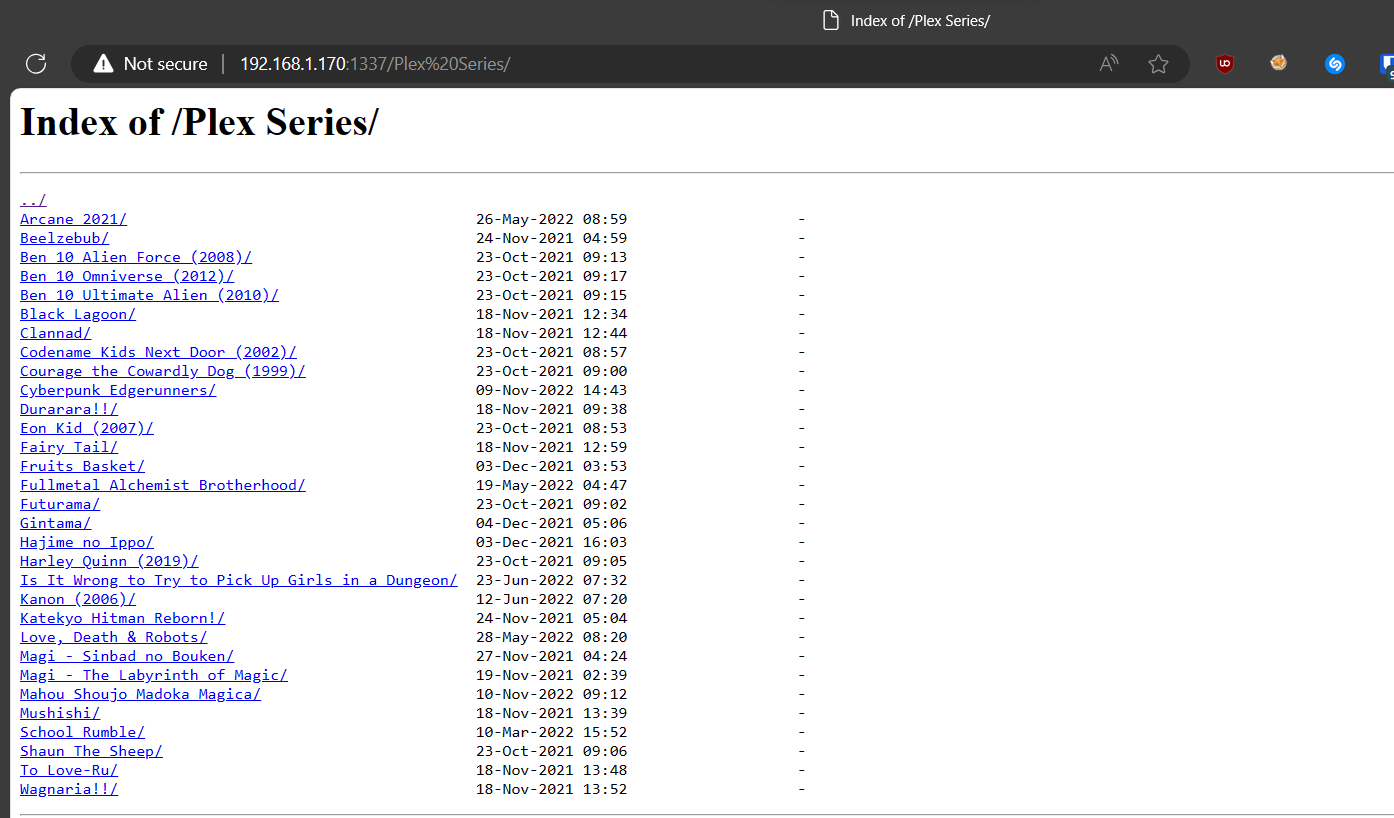
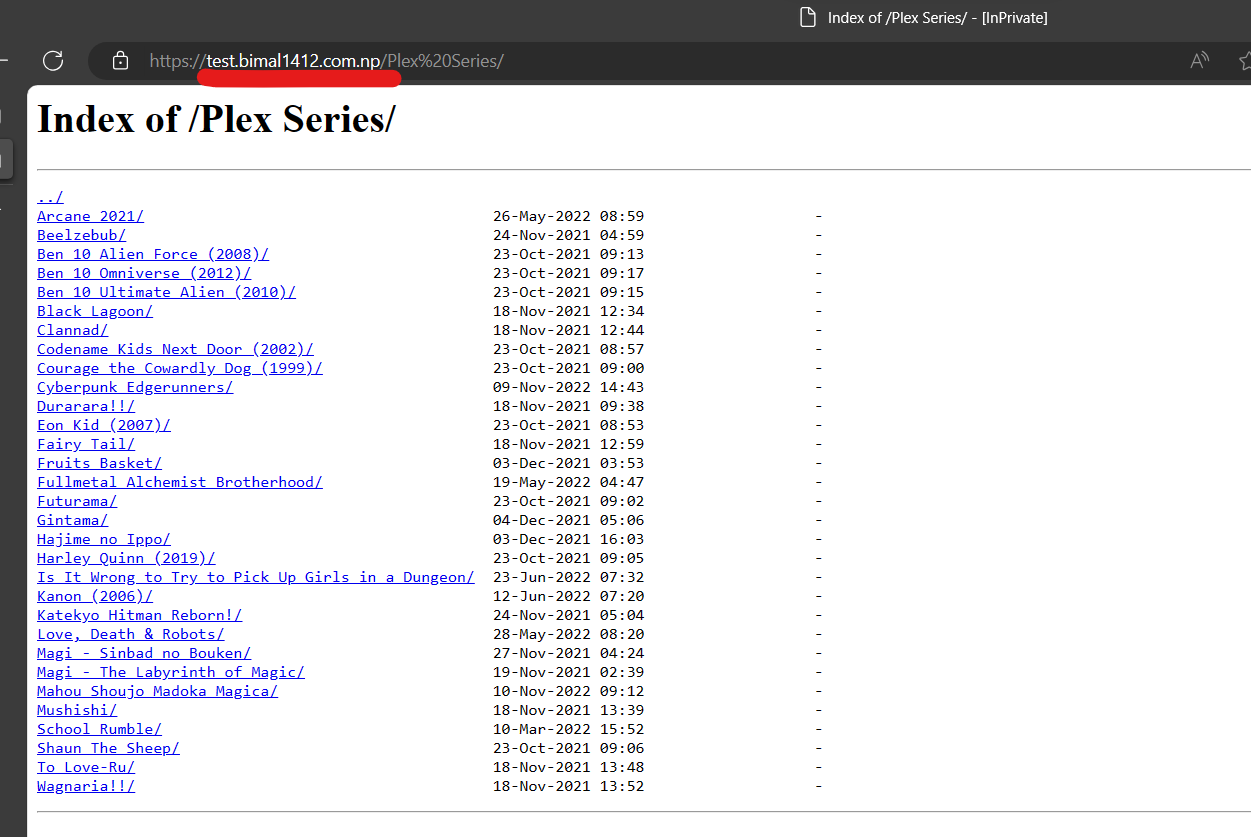
I will try exposing a simple file-serving web server that is made using Nginx which is on port 1337
Create a config YAML file like this
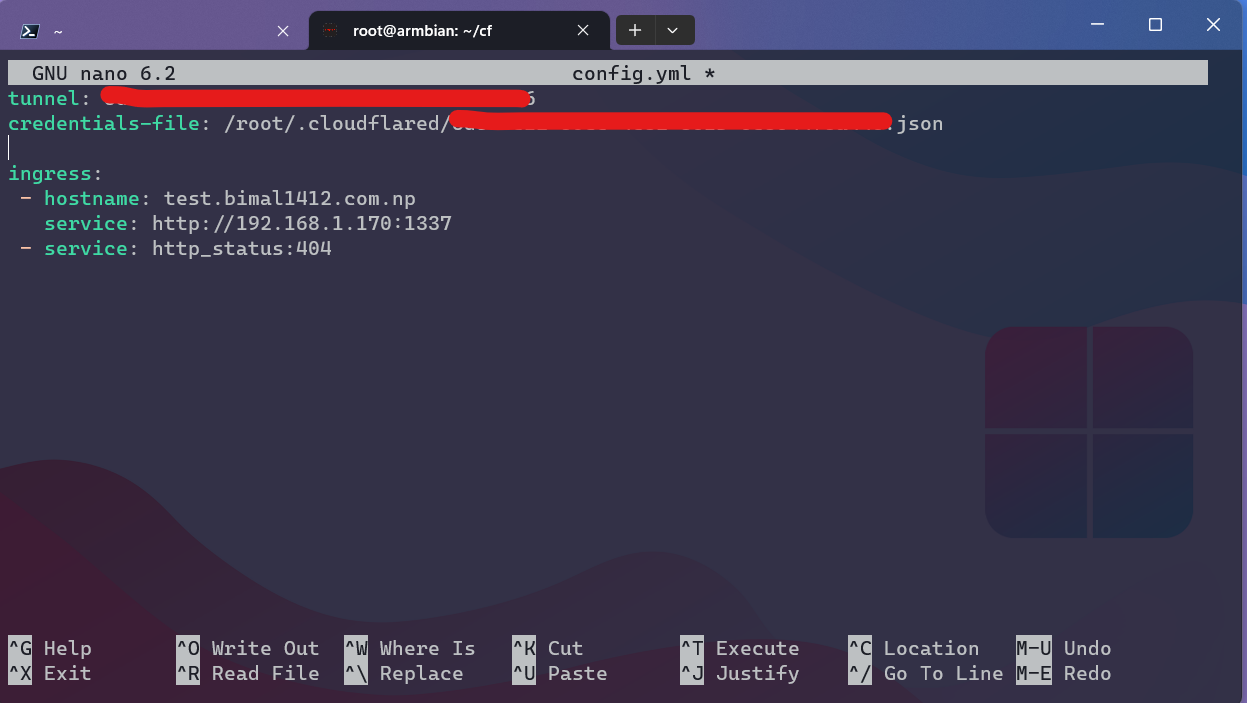
In the tunnel, enter the ID of the tunnel you got while creating it, and in the credentials file enter your JSON file location that you got while creating the tunnel.
tunnel: <Tunnel-UUID>
credentials-file: /root/.cloudflared/<Tunnel-UUID>.json

ingress:
 - hostname: test.bimal1412.com.np
   service: http://192.168.1.170:1337
 - service: http_status:404
For example, in the config above, add the subdomain name where you want your service to be accessible, and in the service, add your service's address. You can add add many services as you want. Just add another - hostname and below the service address you want to expose.
Once it's done, save the config file. Goto your Cloudflare Web Dashboard, and add a CNAME record with a name you are using on your config, for me it's test
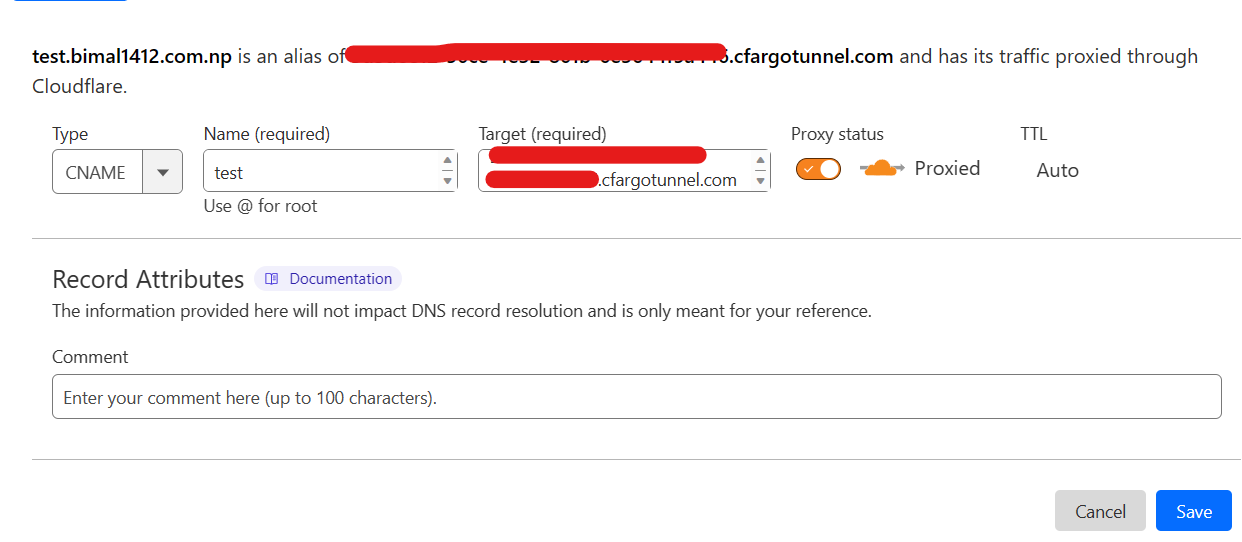
and in the target box, add <YOUR TUNNEL ID>.cfargotunnel.com
And hit save. You have to do it with multiple subdomains if you are trying to expose multiple services to the internet.
Now on the server run
cloudflared tunnel --config /path/your-config-file.yaml run
it should start exposing your service to the tunnel and should be accessible through the subdomain name.
Now to run the whole thing in the background as a service, Cloudflare makes it really easy. Before running it as a service, first move the config.yml file you created to the Cloudflared's directory, which in my case is /root/.cloudflared/, and also make sure the config file is named config.yml.
Now that's done. Just run the command
cloudflared service install
systemctl start cloudflared
And that's all. Now the tunnel service should be running in the background and will auto-restart itself if the internet goes out or the server restarts.
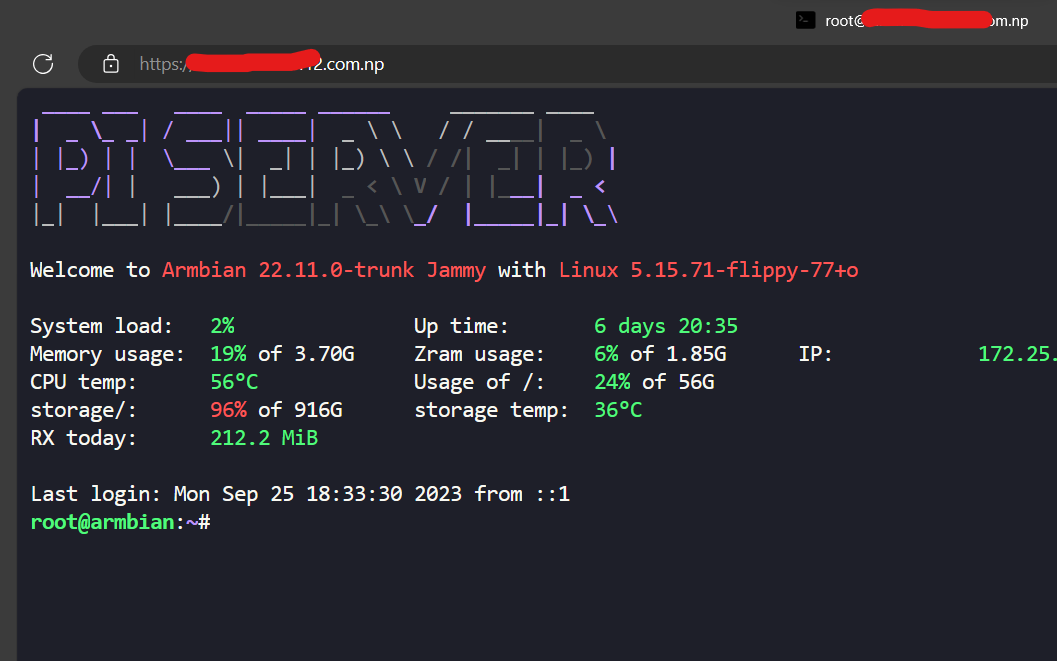
To check if it's running or not just enter service cloudflared status
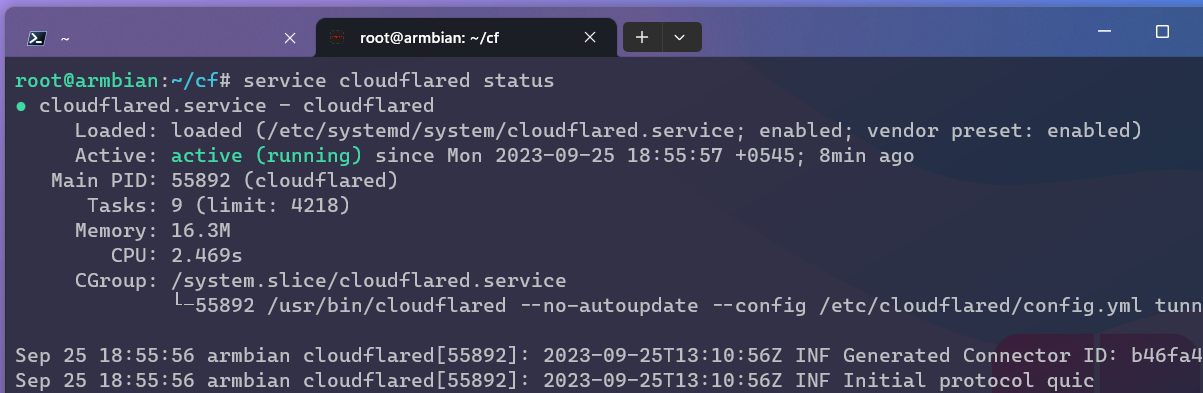
If it's saying active in green, then you are good to go. And the best part is, speed is really good.
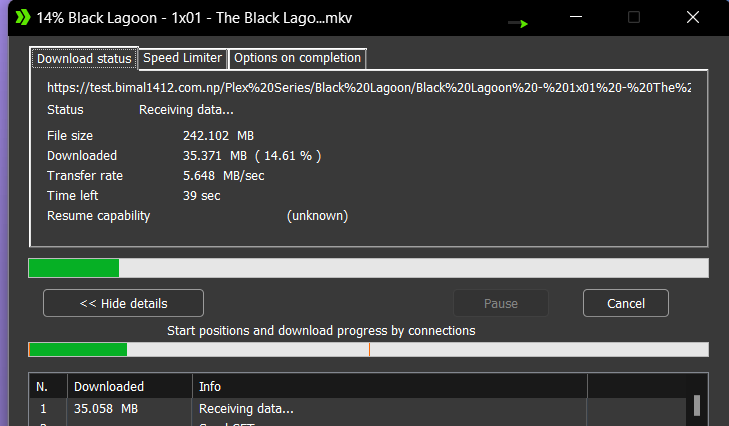
It totally depends on your home's Internet upload speed since you are sending the file to the tunnel and again receiving it from the tunnel.
You can also tunnel the ssh of your machine to the internet.
In the config service file simply add
- hostname : <YOUR DOMAIN NAME>
  service: ssh://<YOUR MACHINE IP>:22
But the tricky part here is, that to access the SSH, you need to have Cloudflared installed on the machine and have to make some edits to the config. You can download and install Cloudflared for Windows 11 using Winget or you can just head over to this link and download it from there.
For example, on my Windows 11 machine, inside the .ssh directory, I have made a config file like this
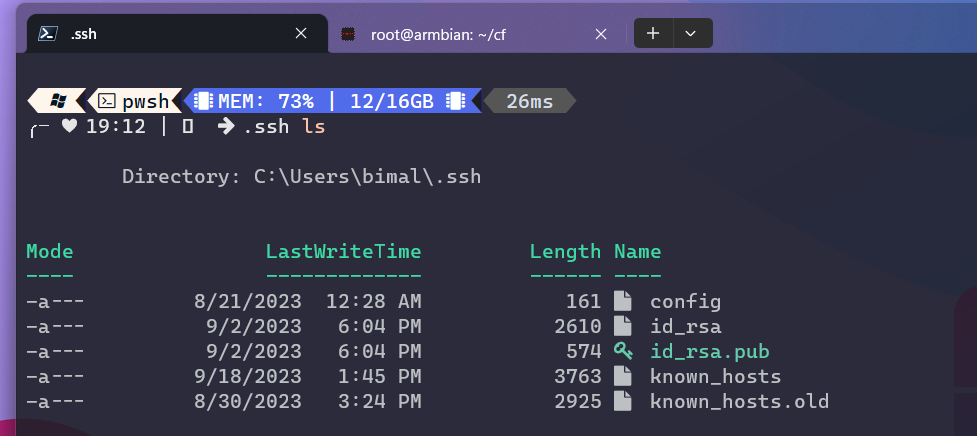
Inside the config file
Host <YOUR SSH SUBDOMAIN>.bimal1412.com.np
     User root
     ProxyCommand cloudflared access ssh --hostname %h
Make sure that you installed Cloudflared and added it to the system environment properly.
Once that's done you can access the ssh of your machine from the internet.
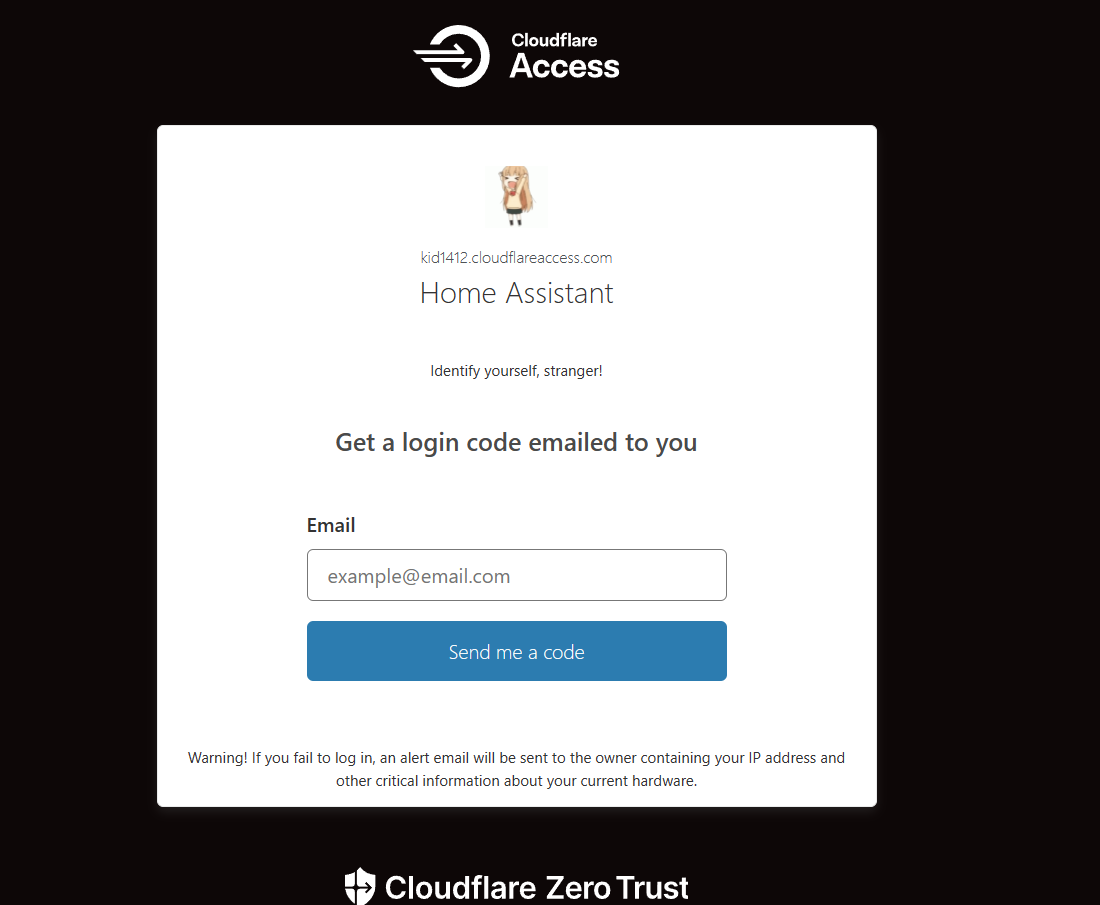
There is also a service of Cloudflare called Zero Trust, that lets you access the SSH terminal directly on the browser, but to access it's free plan you need to have a working Credit Card. I somehow managed to add a working card and use it to access the ssh from the browser.
Also, it can add an extra layer of authentication to all of your tunnels.
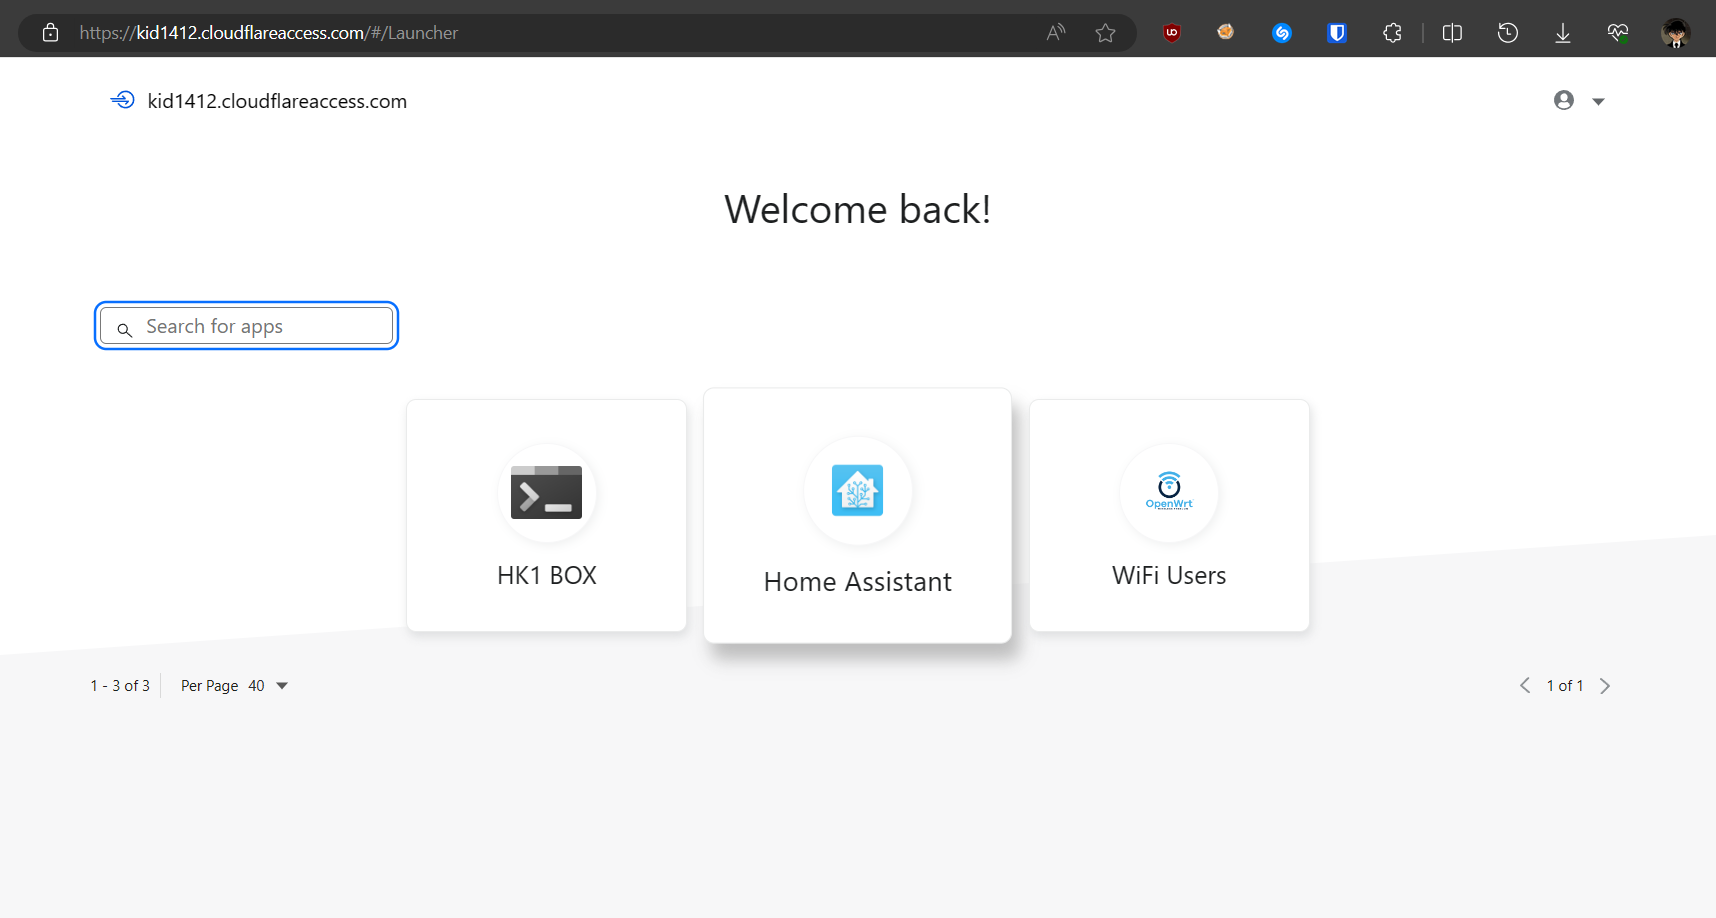
For example, here it lets you add your tunnel services to a dashboard like this. And while accessing each of those services, you can set up different kinds of verification with your own custom pages.